DNS i.e Domain Name System is a Naming System responsible for translating the human friendly domain names to I.P address. In most of the cases, by default – you would be using your ISP’s DNS server which may be slow or some geographical restrictions might be there. In such cases, it’s often recommended to use DNS service provided by third party such as OpenDNS (refer to article about setting up OpenDNS in Ubuntu, basically the process are same – only the I.P address of the servers are different) or the Google Public DNS, did I forget to mention that both DNS service are Free! (in general). it supports IPv4 as well as IPv6.
So, if you are not sure where to use ISP DNS server or Google Public DNS then you must know about some additional benefits of using Google Public DNS –
- Faster DNS Lookup
- Improved Security (Protection from phishing sites/domans)
- No redirection (additionally, you can also access the sites blocked from ISP DNS Provider)
Change your Internet Settings to use Google Public DNS
Although the tutorial is primarily targeted for Ubuntu users but it should also work well on similar GNU/Linux distributions such as Debian, Linux Mint, OpenSuse etc. Just follow the simple steps and enjoy faster web surfing with Google Public DNS.

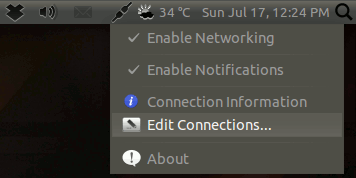
#1. Go to Network -> Edit Network Connections

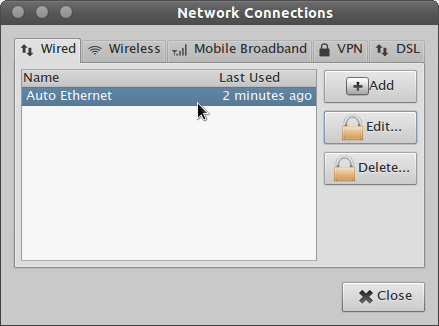
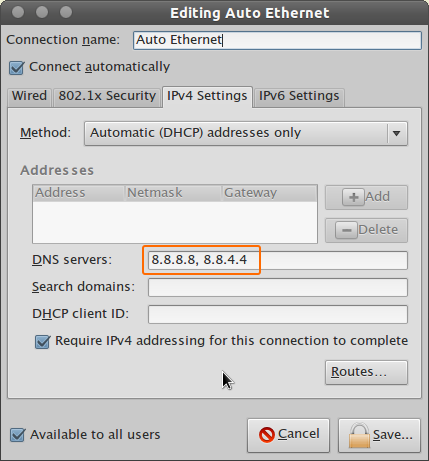
#2. Select your Network connection, you want to setup with Google Public DNS and click Edit. Then go to IPv4 Settings tab and select “Automatic (DHCP) addresses only ” in the Method section.

#3. Now, specify the IP address in DNS Servers field and click on SAVE. Then restart your Router to start using Google Public DNS servers.
8.8.8.8, 8.8.4.4
Recommended Reading(s) and Reference(s)
- Google Public DNS – Go to official page, to know more about Google Public DNS service
- Domain Name System – Wikipedia Page explaining DNS
Thanks…