Ubuntu 11.10 (code named as Oneiric Ocelot) beta 1 has released and final (stable version of 11.10) released a week ago. If you’re a absolute beginner – i.e you’ve very little (negligible) or no experience with Linux distributions then this post might help you in getting started with Ubuntu as it contains step by step instruction for installing Ubuntu 11.10 on your Desktop/Laptop/Netbook.
The instructions given in this post assume that you want to install ubuntu as a dual boot with Windows 7 (or XP/Vista or whatever you’ve already installed), which is recommended for absolute beginners as if any problem occurs with Ubuntu (or you are not feeling comfortable with Ubuntu, although that’s not probably going to happen) then still you would be able to access Windows, but if you want something else like – removing windows and install Ubuntu or erase whole disk and install Ubuntu on a new computer – then most of the steps would be same – few things will change that I’ve pointed out (Jump to steps).
Ubuntu 11.10 beta 1 has released with a lot of surprises/changes, new features and some improvements in the unity desktop. One of the biggest change is that Ubuntu 11.10 uses Gnome 3, unity also uses Gnome 3 so it means you can install gnome shell on ubuntu 11.10 – in few steps without breaking the unity i.e it will support Gnome 3 without any problem. (although there may be some bugs right now as it’s beta release).
Installing Ubuntu 11.10 – step by step guide
Ubuntu 11.10 can be installed in many ways – one of the easiest method is using wubi installer, but it doesn’t provide much control options so we would go with advanced installation..and one more thing – it’s not as difficult as it appears to be, just follow the instructions – if you’ve any doubt then drop a comment.
Preparing for installation : First of All – backup your important data
Before going to start the installation procedure – you are strongly recommended to backup your data (using a backup disk or online backup program), although you aren’t going to loose any if you’ve multiple partition on your drive and want to go for custom installation procedure, but you’re supposed to have a backup of all your critical data before starting any experiments.
Step 1. Download Ubuntu 11.10 ISO file
First, Download Ubuntu 11.10 ISO , select the archive file (ISO) depending on your computer architecture – such as Intelx86 or AMD64. If you are not sure then go for first one. When the download is complete move on to next step.
Step 2. Create a bootable media (USB/CD)
Then create a bootable USB stick/drive or a CD/DVD from the ISO file you’ve just downloaded. If you want to create a bootable CD/DVD – then it’s pretty easy- you just need to burn the ISO image to the cd.
On Windows
If you are using windows now then use the free program called – universal USB installer. To make your pendrive bootable – use Universal-USB-Installer (Download and run it – then locate the ISO file, choose your USB drive as a target and your will be done in a minute). In Windows 7 you can burn ISO files directly in few simple steps – Insert cd in to the tray, right click on the ISO file and select burn this ISO.. and finally you will get a bootable cd.
On Ubuntu
There is a program called – ‘Start Up Disk creator’ is installed by default on Ubuntu. So just run the program – browse the ISO and select your pendrive/cd as the target startup disk. That’s All.
In the and of step 2 you will get a bootable media – which is also called as Live CD/USB Installer (this is also very useful for removing viruses from Windows or recovering data from corrupted OS, as you don’t need to enter any password (exception : BIOS password) when your boot your computer using this live cd/usb), Now we will boot the computer from this bootable disk and finally we will install it permanently into the hard drive.
step 3. Insert the USB disk (or CD) and restart
Now restart your computer (and enter your supervisor BIOS passsword, if you have set any password – you system may not boot from CD if you enter user BIOS password). Your computer should boot automatically from the bootable media, and the Ubuntu will be loaded in RAM (if any option comes then select ‘try Ubuntu without installing if you want to take a look before installing it on your hard drive’).

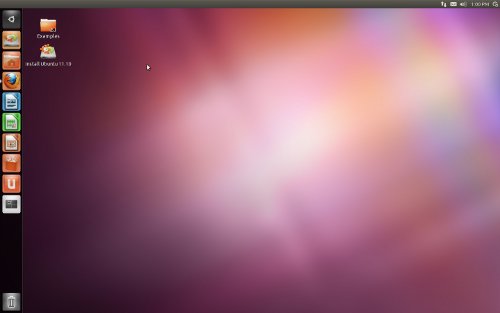
Then click on the install Ubuntu 11.10 icon on the desktop to begin.

Step 4. Select Installation Type
Now select the check boxes such as ‘Download Updates’ and ‘install third party software’, but you must be connected with Internet (it’s recommended – if wireless network doesn’t seem to work use wired connection). Although there is no hurry – you can always install them later, so it’s optional.

then click on continue – then a new window will appear – where you need to select installation type.

You may get different options depending on your computer configuration. The above snapshot has been taken while installing Ubuntu 11.10 on a computer with Ubuntu 10.04 and Windows 7 pre-installed as dual boot (Now it’s time for triple boot, it’s cool! Hmm). Most of the option seems self explanatory –
- Install Ubuntu alongside with them : it will install Ubuntu 11.10 alongside with existing operating systems such as Windows 7.
- Erase Entire Disk and Install Ubuntu : it’s going to erase your whole hard drive and everything will be deleted (your files as well as other operating systems), useful only if your hard-drive doesn’t have any important files or you just bought a new computer and want to keep only one OS – i.e Ubuntu.
- Something Else : Create, Allocate and choose the partition to which you want to install Ubuntu, using advanced partition manager. At first look it may seems little difficult but it’s better as it give you more options/control.
We will go with the third option – select Something else and continue.
Step 5. Create a new Ext4 Partition and Install Ubuntu 11.10
In the end of step 4, you will get the partition manager window for creating/deleting partitions.

Then select the free space available for creating partition (if you don’t have any free space then try deleting any empty NTFS drive or the partition whose files has been backed up completely).
Now select the partition which says – ‘free space’ and click on ‘New Partition Table’.

Now, there are so many field in new partition window –
- New Partition Size : The size of the partition (in megabytes) where you are going to install ubuntu 11.10.Recommended minimum size is 15 GB, if you want to use it for daily purpose, although 5GB (or may be less) is critically required. I’ve left it default as I want to use all that selected free space partition (around 51GB).
- Location for the New Partition : beginning (if you want it to appear on the top in grub menu (when the system starts) – default OS ) or end (if you want the Ubuntu 11.10 to appear at the end in OS list at GRUB). Don’t worry you can change the default OS later. Let’s choose Beginning.
- File System (use as) – select Ext4 journaling file system , the latest and recommended files system for Ubuntu 11.10.
- Mount Point – select / (forward slash), it’s used to mount additional file systems, forward slash means – mounting is done with reference to root.
Then click OK to apply.

Next, click on Install Now button to begin installation procedure.
Step 6. Enter some basic info and Create a user
While installation procedure is going on – you will be prompted to enter some basic information such as
Your Physical Location – it will be used to set your local time and other settings. Select it on world Map.

Keyboard Layout – Leave it default if you aren’t sure or select the one you want to use.

Then Enter some basic details about the user –
- Your Name : of course your Name (Mr(s). X)
- Computer’s Name : x’s computer
- username : Your username – e.g mrx
- password : Your password (strong – something like this (think twice it’s very easy to remember and it’s very strong!) – U11#kkd_MS!)
- Require my password to login : better leave this option selected if you want authorized access (unless you aren’t using BIOS password) to your computer, else you can also choose the other option – login automatically.

Step 7. Restart your computer
Now the installation procedure will complete within few minutes.

Now when you see a window saying installation is complete – restart your computer and remove the installation media and select Ubuntu 11.10 at the boot menu, and login to ubuntu.

That’s All..Now it’s time for installing some basic applications – 10 things to do after installing Ubuntu 11.10, for performing some common tasks.
Update1 : Added a video explaining how to install Ubuntu 11.10, although steps aren’t exactly same as described above but it might help you.
This the Universal USB installer method does not work with the latest version of that program.
why not! just select unlisted Linux ISO from the list. Actually, it’s a beta release so it hasn’t been added in Universal USB installer ..before the stable release it will be listed there.
What Unlisted version? New Syslinux?
Yeah! .. Unlisted Linux ISO (New Syslinux) ..
Unlisted Linux ISO (New Syslinux) did not work when i just tried it. got error ‘No Default or UI Configuration directive Found’
I have heard that you are supposed to be able to simply ‘dd’ or ‘cat’ the iso file to the flash drive. Still trying to find a decent way to do this under windows so i can point the windows users to the right toole.
what is the install RELEASE icon on the unity bar?
The computer won’t boot from the usb stick created. What can i do?
I have windows 7 installed on a 500gb drive now, and just want to get ubunto alongside, do i need to partition the 500gb drive first? or can the ubuntu installer do this and make the boot menu on its self?
Just Shrink the c drive and create standalone drive or partition for ubuntu ….
which is a goog option for you ….. see installation steps of ubuntu on net …..
I have upgrade it from Ubuntu 10.04 but after reboot and login with password, terminal screen pops-up and I do not know what I can type in to start… anyone can help ?
Thanks for the only serious attempt I have found to explain Ubuntu 11.10 installation. I am trying to install it on a new computer with Windows 7. I want to keep a dual boot with Windows 7. So I pick the “something else” option and get the window you show in step 5. But there is no free space. There is a big, 480 GB partition, so I select it, click “change” and resize it to 200 GB. After a rather long time, maybe 10 minutes, it is changed, but the liberated 280 GB space is not “free space” but “unusable”. And I can do nothing with it. Putting the cursor on it and clicking “New partition table” has no effect. Double clicking and right clicking have no effect. Clicking Delete, Add.., Change, Revert have no effect.
Any suggestions?
Any luck yet as I have the same exact problem?
use minitool partition wizard on win7
Problem with my install is that I can’t install. I’ve followed the instructions to a T and when the CD loads the install screen, all I get is the wallpaper and the pointer is just an opaque square and all windows are blank with thin graphic lines and no text at all? What gives?
thanks a lot for the support but Intstalation type screen doesn’t show up. and my intstalation process gets freeze at “detecting file systems” ..
hey guyz please help me out..im trying to install ubuntu11.10 from bootable media..and on startup its detecting my USB drive and even asking many options on black screen..when i choose “install on hard drive”…it just started loading all files like command prompt in winXP…and at one place..it got stuck..osme “4.975129] ACPI: power button [pwrf” ” please help me out guyz to resolve this problem !!! Thanks
Im having the same problem, ever find a solution?
Same problem here…. any solaution. Got Stuck at some point that goes like this
[3.937603] ACPI : Power Button [PWRF]
it doesn’t recognize my partitions
:/
I just got another computer from a neighbour that I want to install lunix on, but its currently on windows xp and has Raid set up on the drives. How do I deactivate the raid, or install with it on, when I try install now it dosent recognize my HDD.
Hi all. I try to install ubuntu 11.10 in a Gigabyte from usb but it keeps throwing “boot error”, width this same usb i installed ubuntu 11.10 in an hp lap top. Help please.
Helo,
I tried to install Ubuntu 11.10 from a bootable CD. First I chose my language “German”, then I chose the installation. After a few minutes I get the new Ubuntu Screeen. Ubuntu asked for Username and password. I entered my Usurname and a password Ubuntu does not accepted the password every password was invalidplease help.
Please help me Father…. I tried to install ubuntu 11.10 but it didn’t read my windows7 OS
I thank you or whom ever took that blank screen shot because it is awesome!!!!!!
I thank you or whom ever took that blank screen shot because it is awesome!!!!!!
I thank you or whom ever took that blank screen shot because it is awesome!!!!!!
thaks a lot……………