Ubuntu 11.10 (Oneiric Ocelot) is expected to release on 13th of this month, I’ve tried the beta versions. Few months ago, just after the release of Ubuntu 11.04, I published a post on Ubuntu 11.04 Tips ‘n’ Tricks, and it was a big hit – I got a lot of positive feedback. In fact, it was lot useful for a beginner Ubuntu users – specifically those who are coming from the Windows background. Some of the tips explained there are also valid for 11.10 (perhaps for all version of Ubuntu or may be for all Linux based OS) but most of the tricks are obsolete due to some major change like GTK 3 (instead of 2.3).
That’s why I thought to write an updated version of those cool tips ‘n’ tricks, and the expected users are absolute beginners but intermediate and advanced users might benefit from it. If you’ve just installed a fresh version of Ubuntu 11.10 then first go through this post – 10 things to do after installing Ubuntu 11.10, then come back here and apply some tips/tricks to customize the Ubuntu in your way.
So here is my most favorite collection of Tips and Tweaks, for a beginner Ubuntu 11.10 user. If you have something to say (e.g if you want to add or improve an existing tips or you want to share you experience or have some feedback) then feel free to share with us (using comment box).
Top 10 – Ubuntu 11.10(Oneiric Ocelot) Tips ‘n’ Tricks
The tips and tricks described here, are primarily aimed for Ubuntu 11.10 users but some of the tips may works seamlessly with other Linux distributions (specifically Debian based) such as Linux Mint, Opensuse, Fedora, Debian, or other Ubuntu derivatives such as Kubuntu, Xubuntu, Edubuntu, MythUbuntu, Ubuntu Studio etc. So feel free to experiment but – always keep a backup to encounter any unexpected results.
1. Try GNOME Shell
Ubuntu 11.10 uses Gnome 3 (based on GTK 3) but the default user interface is Unity. Unity has improved a lot, but if you want to try something new or you like Gnome 3 (or you might be hating Unity), then it’s time to enjoy the next generation revolutionary desktop – GNOME 3. Gnome 3.2 is the latest version. It has a lot of new and innovative features.
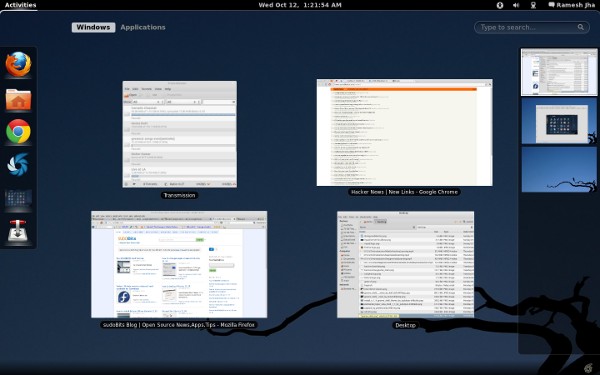
GNOME 3 has been developed and designed from scratch rather than just adding some new feature in the predecessor version. The whole idea is to make desktop computing more fun and productive (switching between workspaces and windows takes very little time as compared to earlier max/min approach, distraction is also very less). So if you want to use Gnome 3 with Gnome Shell then you just need to install the second one i.e only the gnome shell (The User Interface for Gnome 3) because Gnome 3 is already installed by default (and unity is running on the top of it).
To install Gnome Shell, Open a terminal and Execute
sudo apt-get install gnome-shell
I’ve already covered a post about Installing Gnome Shell in Ubuntu 11.10, so refer that for detailed instructions.
2. Mount hard drive (partitions) automatically at startup
When your computer starts, it won’t mount any other hard drives or its partitions other than the File System (The partition where you’ve installed the Ubuntu). It means the other partitions will not be available by default, so you will have to mount it each time you log in to your computer before you use it.
For example, if you are using Ubuntu in dual boot mode with Windows 7 or any other OS then you may have multiple other partitions (including NTFS, FAT or other EXT4), so in that case if you’ve any desktop links which points to such partitions or any playlists whose contents resides on that drive, then it’s better to mount such partitions when the computer starts so that it will be available for use without any manual mount.
To mount drives/partitions automatically at startup (during system boot) you can use a simple utility – PySDM, a Storage Device Manager. It’s a cool application written using PyGTK and very helpful in customizing mount points for your hard drive(s)/partitions.
How to Install PySDM ?
Open a terminal (press Ctrl+Alt+t) and execute the command –
sudo apt-get install pysdm
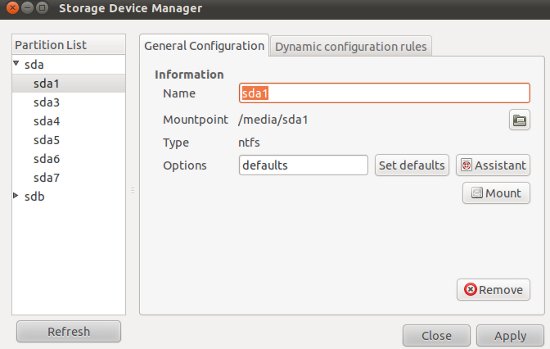
Then start the application either by searching it in apps menu or press Alt+F2, type pysdm and hit Enter. Now you can customize it the way you want – Select the drive/partition, configure it and click on Apply. To avoid any possible loss from your silly mistake – Just Backup!
3. Advanced GNOME 3 Settings – using Gnome Tweak Tool
Gnome Tweak Tool is a simple application that will allow you to change/customize Gnome 3 desktop in an advanced way. If Gnome Tweak Tool has lot of options such as Shell, Themes, Fonts, Desktop, Icons, etc to tweak the appearance and look. So it’s a must have Apps for Enthusiastic Ubuntu users.
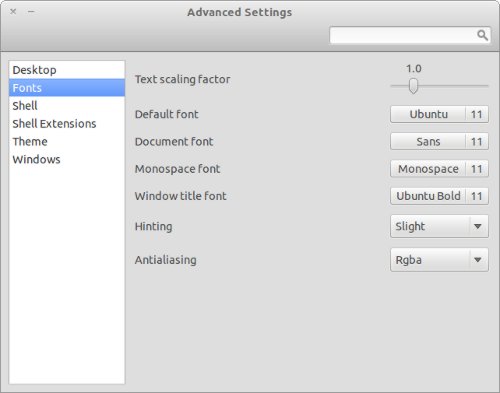
To install Gnome Tweak Tool, open the terminal and execute –
sudo apt-get install gnome-tweak-tool
4. Sync Tomboy Notes using Ubuntu One Cloud
Tomboy Notes is a simple note taking application – with a lot of features. If you have been using Evernote on Windows or Mac OS X, then you will be disappointed to know that – it’s not available for Linux based OS such as Ubuntu. Tomboy is a great application – it doesn’t have all those features but it’s a good alternative to evernote or other note taking programs. The most exciting feature of evernote is Sync – it automatically synchronized your notes with the main copy (stored in the remote server/cloud), which can be accessed from any where -computer(Windows/Mac), iPad, iPhone or Android. Tomboy has all these features by default – you just need to configure it. The default functionality can be easily extended, using plugins(add-ins).
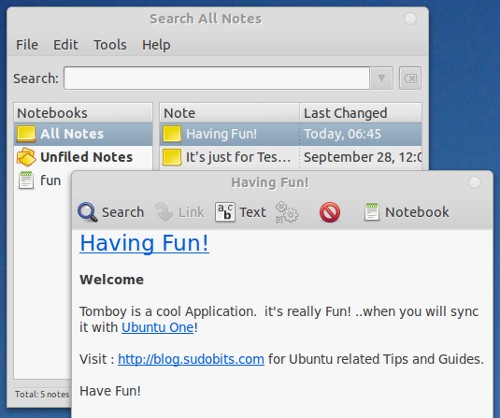
To enable sync feature in Tomboy Notes you can use Ubuntu One (it provides 5 GB free storage for everyone). Ubuntu One and tomboy both are installed by default in Ubuntu 11.10. So –
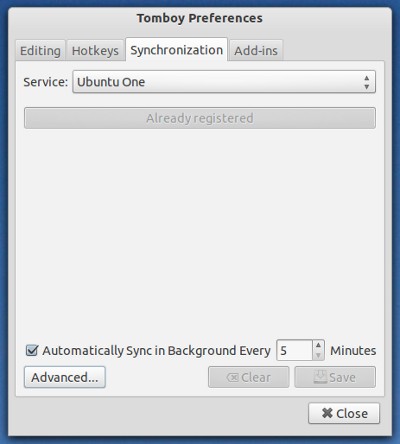
To start synchronizing your Tomboy Notes, first configure Ubuntu One for backup, Then Open Tomboy Notes and go to Edit -> Preferences and select Synchronization tab. From the list of various sync option -select Ubuntu One!
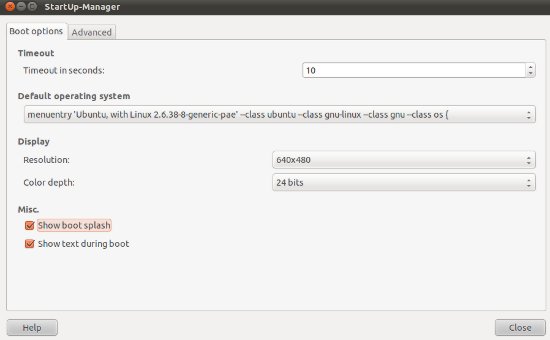
5. Configure Boot Options – GRUB, using StartUp Manager
Startup Manager is a simple application that will allow you to customize GRUB and splash screen, in GUI mode. There are various options such as display size of GRUB menu(in pixels), default operating system to boot, timeout(in seconds) etc. To install startup manager, open a terminal and execute the command –
sudo apt-get install startupmanager
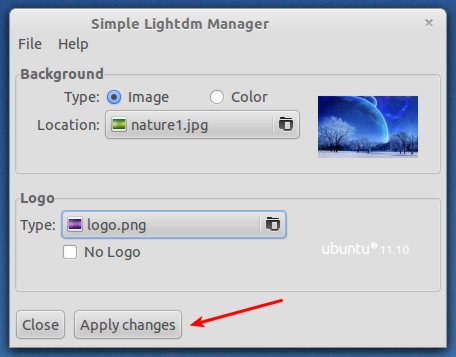
6. Customize the appearance of LightDM Login Screen
The default background at LightDM login prompt isn’t cool, Right? Probably yes! Using a simple application or tweak you can’t only change the background image but also the logo. It’s Fun!
I’ve already discussed a lot about changing background screen in Ubuntu 11.10.
7. Backup Your important Files using DejaDup
DejaDup is a simple, easy to use and fast backup program. In Ubuntu 11.10, DejaDup has been included in default programs installed with standard distribution package. So you got dejadup installed by default on your system but you need to configure it before it will start any backup job. DejaDup is a very powerful backup tool – it has lot of options to backup, e.g you can backup your data anywhere you want – local file system or remote location (on a standard server or Cloud such as Amazon S3).
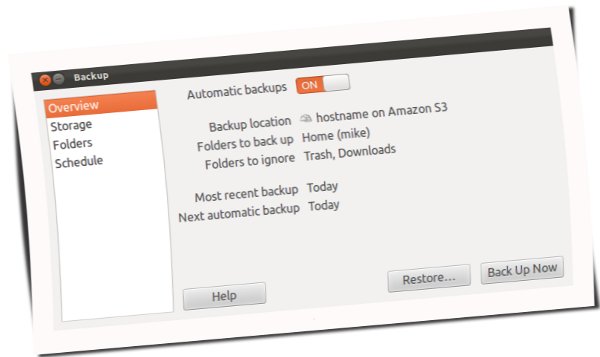
If you want more detailed explanation then refer the post – how to backup Ubuntu 11.10, where I’ve explained about different backup options, in detail.
8. Install Cool themes and icons
The default theme and icons is cool but you may want to try something else. That’s very easy because a lot of free Gnome 3 themes and icons are available free to use. If you aren’t sure about which themes or icons to try then refer these posts – best Gnome 3 themes or Top 10 Gnome Shell Themes (if you are using Gnome shell), where I’ve sorted few best and good looking themes for Unity and Gnome Shell interface.
How to install themes/icons in Ubuntu 11.10 ?
step 0 Open nautilus with root power. To do that, open a terminal and execute the command –
gksu nautilus
step 1 To install GTK 3 themes you just need to copy the theme package to the usr/share/themes directory.
step 2 To install gnome shell themes – First, copy the gnome-shell directory from the theme_package to usr/share/gnome-shell. Second, rename the existing theme directory to default-theme (for backup purpose). Third, rename the gnome-shell(the one you’ve copied) directory to theme. Finally press ALT+F2, type r and your new shell theme will be reloaded (or you can just logout from the current session, and on next login, you will be enjoying something new!).
step 3 To install icons – copy the icon package to usr/share/icons

step 4 Finally You can select the theme or icon you want to use, through the help of Gnome Tweak Tool (see above if you don’t know)
9. Screencast Recording with Gnome Shell
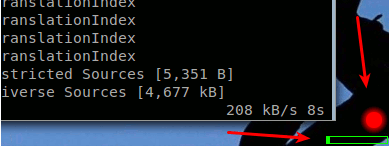
screencast recording feature is built-in feature in Gnome shell interface. So if you want to record a screencast in Gnome shell, then you don’t need to install any application. You can start recording screencast just by pressing Ctrl+Alt+Shift+r (press again to stop/start). When the screen recording will begin, you will notice a red dot at bottom-right corner of the screen. Finally the file will be saved in home directory of the user with the file name like this – shell_today_date.webm.
10. Cool shortcuts for productivity
Keyboard shortcuts are very useful for speeding up your productivity to some extent. Since Ubuntu is an open source OS, there is no limit on how much you can customize. If you have been using shortcuts for a while, then first thing you would want is to change the default(if it doesn’t matches with yours) keyboard shortcuts.
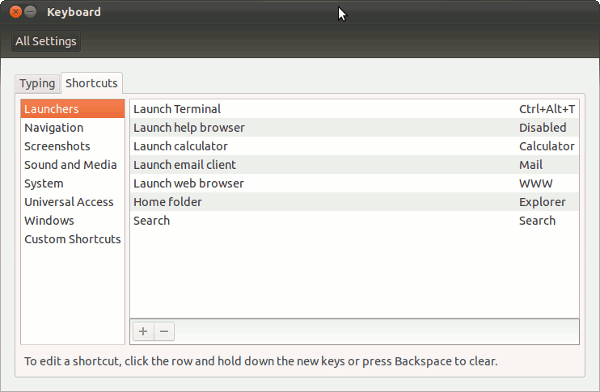
To set your custom keyboard shortcuts go to System Settings -> Keyboard -> Shortcuts and define your own shortcuts.
Bash Aliases are also cool if you play a lot with Terminal. For example, if you are a ruby on rails developer, and install a lot of gems using the command gem install gem_name, then you can save a lot of typing by defining an alias for that. I’ll make it more clear with an example.
Creating alias commands for Terminal
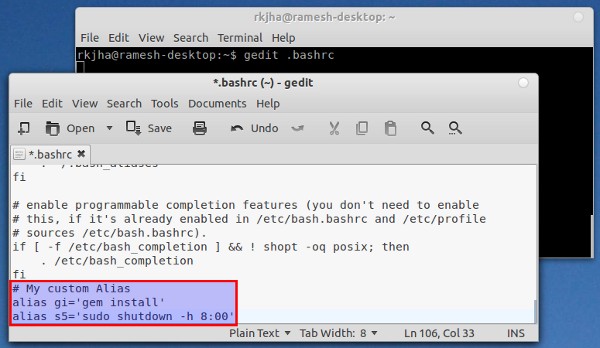
step 1 Open terminal and type
gedit .bashrc
step 2 Now, insert these lines at the bottom and save the file.
# My custom commands aliases
alias gi='gem install'
alias s5='sudo shutdown -h 8:00'
step 3 Next, reload the bash profile to propagate the changes, using the command –
source ~/.bashrc
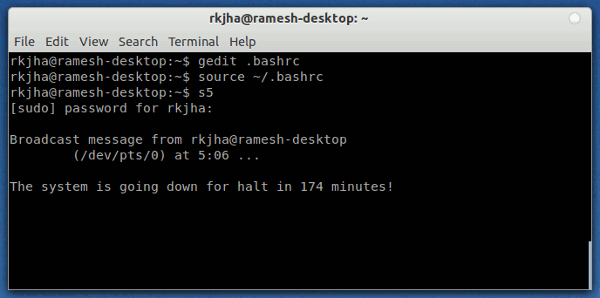
step 4 That’s All..now you can see the command(defined in right side) in action – just by typing its alias name.
Have Fun!

thanks for the great article ^_^
You’re Welcome! 🙂
Mr. Jha! Thanks a lot bhai. Good job.
A better job than the folks at OMGUbuntu! if you ask me. They failed to point out and provide a solution for the lack of customization in Ubuntu 11.10. I personally think customization is what made Ubuntu so popular for the previous versions. I am willing to give Ubuntu 11.10 another day of testing, but if I don’t see any update manager improvements, then I am switching to Kubuntu (hopefully they fixed several of the KDE random crashes). We shouldn’t need to download all this extra help because some developer assumed everyone would love the default.
I honestly, cannot still comprehend why they removed theme installation in appearance. This was like one of Ubuntu’s best features.
Thanks for appreciation! 🙂 I’m completely agree with your ‘theme installation from Appearance’ point. Gnome Tweak Tool (with Gnome Shell Extension) might do a good job but the theme management/customization has become more complex than earlier.
Also theme customization.
It all had better be fixed by 12.04 or I’m going to jump ship to elementary os
With Ubuntu 11.10 I cannot add Ubuntu one as synchronization for Tomboy.
First of all, the Ubuntu one synchronization option doesn’t exist and secondly, when using Tomboy Web I cannot press the save button, after connecting to Ubuntu one Website. Anyone any ideas ?
I found a solution:
https://bugs.launchpad.net/ubuntu/+source/tomboy/+bug/842278
I tried to install netbeans in 11.10 but it doesn’t show?
checkout nixnote for ubuntu…
I try to turn on numlock in gdm while login with numlockx, but unfortunately traditional method doesn’t work. Have you got any ideas how to turn on numlock in gdm/lightdm ?
nice article
I just upgraded to Ubuntu 11.10 and am having permission issues with mounted drives / partitions. As described in number two above, I use Storage Device Manager -> “Assistant” to adjust settings for my NTFS partition. All worked fine in 11.04, but now I can’t uncheck the “Mount file system in read-only mode” option. Nor can I change the umask permissions. When I uncheck these options and close the dialog box, and then reopen the dialog box, they are checked again.
What’s the deal?
i have a pretty low tech pc (read pentium 4, 1gb ram, no graphics card), can i try the new gnome 3 shell?
lol fail. how to mount drive at startup “configure it” wow really? configure it how? good god.
I didnt know about the screen recorder thing, thats really smooth!
my windows decorator is not working in gnome 3. any suggestions?
I spent hours trying to install GNOME TWEAK TOOLS, but for some it wouldn’t work. thanks to this website I was able to do it with the terminal code. thank you!
I just installed pysdm in my ubuntu 12.04 but when I tried to open it through dash home it showed no application found and when I searched it by pressing Alt+F2 it came in search results but as soon as I clicked on it to start it gave an error message that “you should have root privileges to run this app”. How to solve this problem