Like them or hate them, everybody agrees that Apple’s products excel in design and aesthetics. This includes Apple’s hardware, software, and even more so, Mac OS. The official operating system for Apple’s Macs has been consistently offering the most polished desktop experience for decades.
On the other end of the spectrum, Linux might have multiple desktop environments, but they all prioritize functionality over looks. It’s not that they can’t look as good, but the default visual experience they offer is (usually) less polished. Linux, though, also has a superpower: it’s ultra-customizable.
Thanks to this, there’s no reason to feel jealous of Mac OS’s looks since you can make your desktop look like its long-lost twin.
Note:
We’ll be using Ubuntu for this tutorial, so everything we will see applies to its default desktop environment, Gnome. Still, you can use the same icon sets, wallpapers, and even the WhiteSur theme on other desktop environments (like KDE). By following along, you can achieve a similar look to what we will see here, but, of course, the steps to get there will be somewhat different.
The Essential Tool: Gnome Tweaks
Gnome-Tweaks is the most popular tool for customizing the Gnome Desktop Environment. It comes with a collection of essential tweaks that can affect how Gnome looks and works.
Even more importantly, though, it works as a control panel for the thousands of themes and extensions you can use to make Gnome truly your own.
To install Gnome-Tweaks on your Ubuntu installation, fire up your favorite terminal (or press CTRL + Alt + T for the default). Then, enter the command:
sudo apt install gnome-tweaks
When the installation completes, find Gnome-Tweaks among the rest of your apps and run it.
Make a Dock
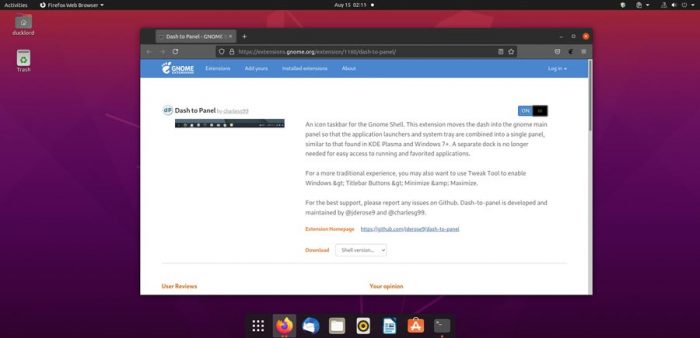
You can use two Gnome Desktop Environment extensions to turn its default panel into a dock similar to the one on Mac OS: Dash to Dock and Dash to Panel. They have similar functionality but offer different options. You should check out both and go for the one you prefer.
To install them visit the official Gnome Extensions site after installing Gnome Tweaks. Follow the steps presented there to install an add-on to your browser of choice, which will allow the site to interact with the Gnome Desktop Environment. Then, search for both using their name: Dash to Dock and Dash to Panel (or click on the links here to jump directly to their respective pages). To install them, flick the switch at the top right of their page to the ON position.
While there, also install User Theme customization support to Gnome Tweaks, for we’ll need it later.
Then, return to Gnome Tweaks and go for either one. In both, you’ll find options that will allow you to have the panel displayed as a dock, choose the screen side where it will appear, and control its size and looks (solid, transparent, etc.).
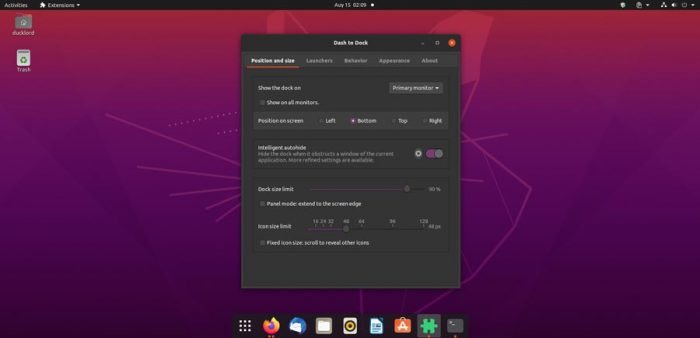
For a Mac OS look, turn your panel into a dock that will display large icons over a semi-transparent background at the bottom of the screen.
Download Everything WhiteSur
Turning the default panel to a dock was only the beginning. What makes even more of a visual impact are the themes of the Desktop Environment itself. Those affect all graphic elements, from the windows and panels to the right-click menu.
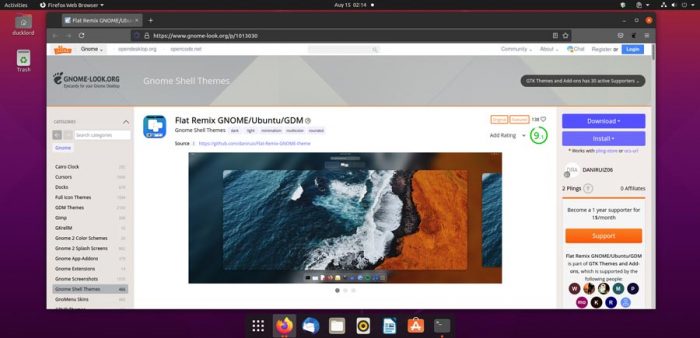
There is no better place to find such themes for Gnome than the popular Gnome Look site. However, it can be hard to locate what you need in thousands of entries. That is, except if you know for what to search. Thankfully, in this case, you do, since we did all the searching and testing beforehand for you! So, search for “whitesur”.
“WhiteSur” is one of the most popular Mac OS – like themes for Linux, and justifiably so. It feels as polished as Apple’s own desktop while bringing the same aesthetics to Gnome Shell.
You will find (at least) a WhiteSur theme for Gnome Shell, one for GTK, a cursor pack, and an icon pack. All sharing the same name.
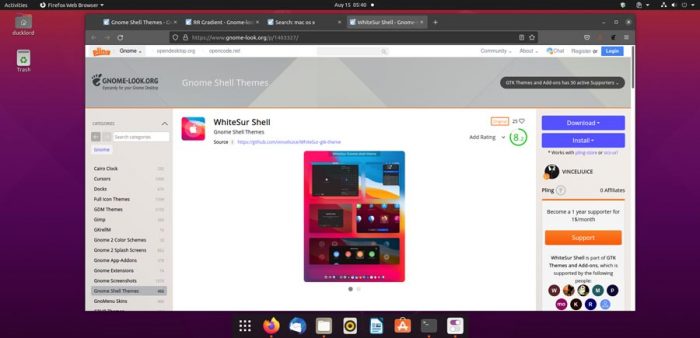
Visit their respective pages and click on the Download button, on the top right, to download each of them locally.
You will need:
- WhiteSur theme for Gnome Shell
- WhiteSur theme for GTK
- WhiteSur Icon Pack
- WhiteSur Cursor Pack
We suggest you save them all at the same spot for ease of use – like your user account’s default Downloads folder.
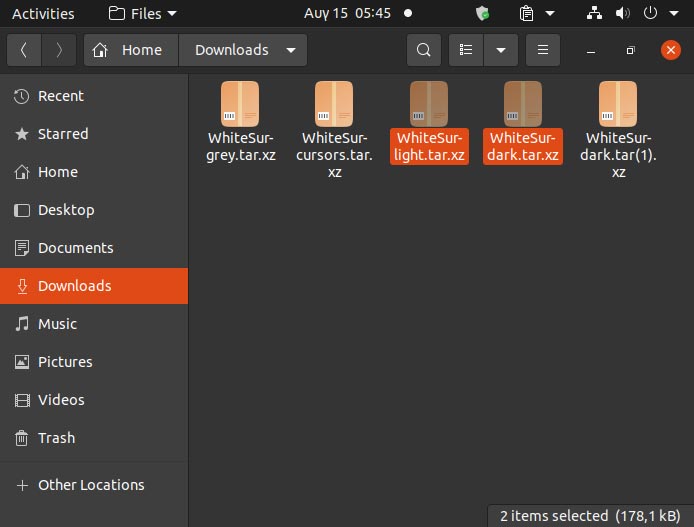
Also, note that some of the themes come with color variations. You can choose the one you want when you click on the download button. Feel free to download more than one – you’ll then be able to switch from one to the other through Gnome Tweaks’ options.
Of Files and Folders
If you’ve never used a custom theme before on your Ubuntu installation, it will probably be missing two folders. Those, named “.icons” and “.themes”, are (usually) located in your “home” folder. As their name states, they’re where desktop and icon themes are stored.
However, you might have noticed that you’ve downloaded four types of theme files, but we’re talking about only two folders. That’s because each of them plays a dual role. Icon and cursor themes are considered close relatives and are both stored within the “.icons” folder. Similarly, both GTK and Gnome Shell themes should go in the “.themes” folder.
So, now that you know about them, it’s time to move the themes you downloaded to their final destination inside those folders.
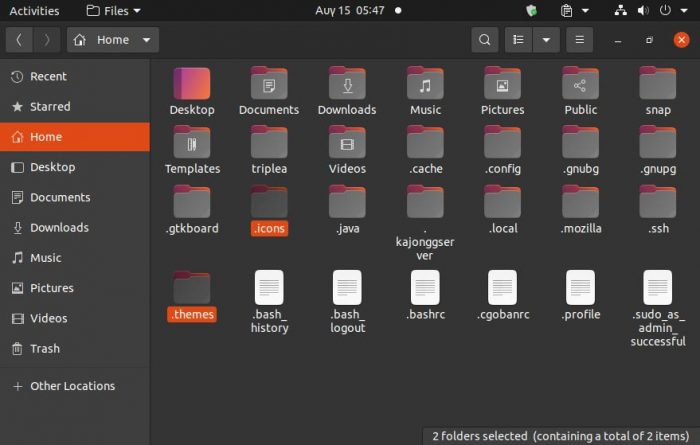
First, ensure those folders exist. Visit your home folder with Ubuntu’s default file manager. Then, press CTRL + H on your keyboard or click on the menu button with the three dots (on the top right) and select Show Hidden Files.
Check if the two folders mentioned above, “.icons” and “.themes”, exist there. If not, create them yourself. Either press CTRL + Shift + N or right-click on the empty space of the file manager’s window and choose you want to create a new folder. Give it one of those two names (remember to include the dot), and repeat for the second folder.
Alternatively, as seasoned Linux users know, you can always go for the easiest route of the terminal. Press CTRL + Alt + T to run Ubuntu’s default terminal. If you haven’t changed its settings, you’ll already be precisely where needed: in your user account’s “home” folder. So, you only have to issue the following command:
mkdir {.icons,.themes}By enclosing them in curly brackets and separating them with a comma, we’re instructing mkdir to create both folders with a single command.
With both in place, you can now move your themes in them.
Theme Extraction
Gnome Tweaks will allow you to choose the themes you’ve downloaded. You have ensured the folders for them exist. So, you’re set, right? Well, not yet. There’s one more thing to do: the actual theme installation.
The files you’ve downloaded are (probably) packed archives. Apart from the theme you wanted, they might contain alternate versions, extra files, notes from its creator, etc. Stuff that may be useful, but not the files you need to make your Linux installation look like a Mac. So, you’ll have to extract those archives and then copy the relevant files from them to the folders you created in the previous step.
For that, run your favorite file manager. Then, pay a visit to the folder where you’ve downloaded the theme files. For us, it was our user account’s default Downloads folder. Select your downloaded files, right-click on them, and choose “Extract Here” (if you’re using Ubuntu’s default file manager) or any similar option.
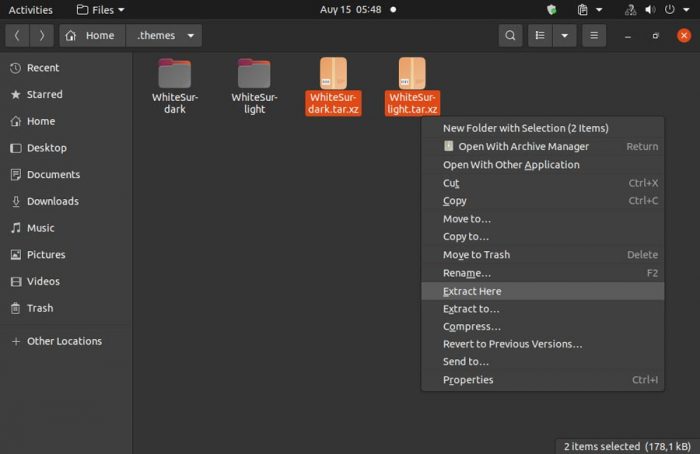
Enter the extracted folders and find the subfolder named WhiteSur-VARIANT, where “VARIANT” may be “dark”, “light”, “pink-with-yellow-dots”, or whatever version of the theme you’ve downloaded. This subfolder is what you need to copy to either the “.themes” or the “.icons” folders you’ve created before.
Remember: the GTK and Shell theme should go to the “.themes” folder, the Icons and Cursors to the “.icons” one.
So, copy the individual theme folders to the appropriate destinations, and… that was it! From now on, it’s smooth sailing. Or, rather, clicking. On buttons and menus. Simple stuff, but let’s go together through it, for good measure.
Activate!
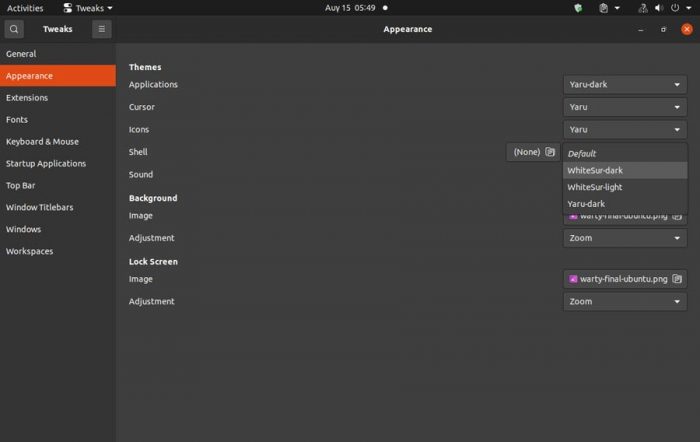
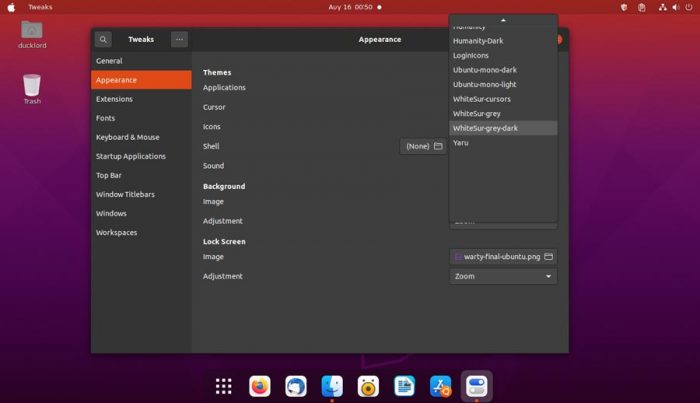
Run Gnome Tweaks again, but this time go straight to the Appearance section (from the menu on the left). Notice that your whole Desktop Environment’s appearance is made up of different elements. Each can be configured individually from the rest.
That’s why you’ve downloaded a bunch of different “bits” of the same theme: together, they’ll change your whole desktop’s appearance.
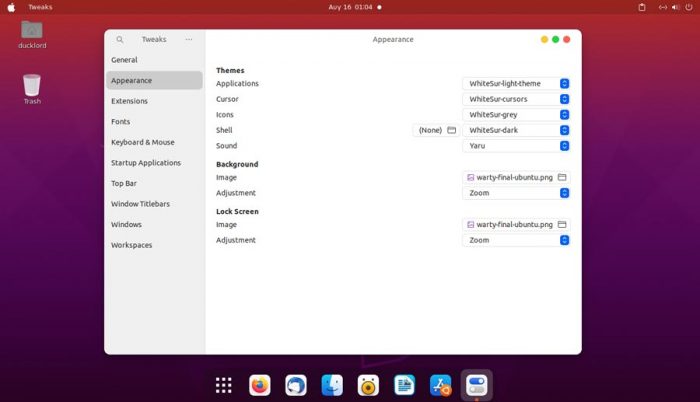
So, go through the drop-down menus under Themes one by one, and change them to the WhiteSur theme you’ll find there.
We did this for every desktop element to make Ubuntu look as close to Mac OS Big Sur as possible. However, you’re free to mix and match themes as you see fit.
Now that you know how to install individual themes and what-goes-where knock yourself out downloading more themes. Then, combining them into a Franken-theme that’s perfect for you!
Final Tweaks
If “something” feels off, well, it’s probably more than one thing. Let’s start with the minor stuff – literally: the icons. You might be used to Mac OS desktops being clean, pristine, uncluttered. In other words, iconless. Gnome Tweaks can help with this, too.
Run Gnome Tweaks and move to the Extensions page. You should already have a “Desktop icons” extension installed by default. If not, now you know how to install more extensions and where to find them, so we’ll skip that bit. Click on the button with the gear to access the extension’s settings.
Disable both the “Show the personal folder in the desktop” and “Show the trash icon in the desktop” options.
There’s only one last thing to change, and you’ll probably realize it after you close or minimize Gnome Tweaks’ window, and look at your blank desktop. Yes, we’re talking about the wallpaper. Thanks to The Power Of The Internets, that’s an easy problem to solve.
Wallpaper: The Missing Element
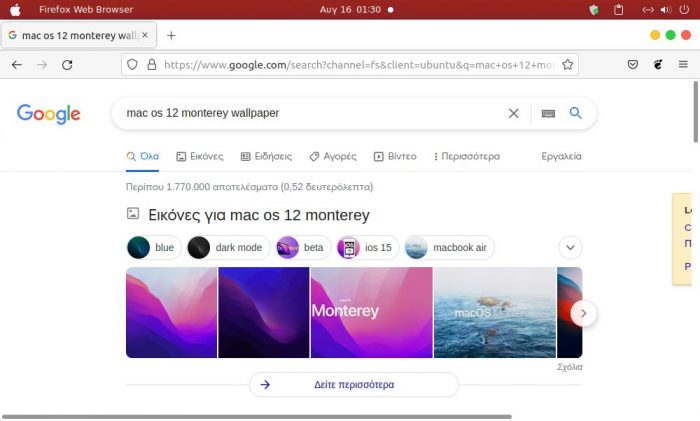
Let’s turn to the source for the missing element: we could use something similar to the Mac OS’s wallpapers, but using the real thing leads to a more authentic experience.
Unfortunately, we can’t provide direct links to copyrighted images such as those wallpapers. However, if you know how to use your browser, you’ll probably be able to find them – or similar ones that would be good enough. We’d use a query similar to “mac os 12 Monterey wallpaper” if we were you.
Thankfully, you don’t even have to leave your browser to change your desktop’s wallpaper nowadays. You can right-click on any image in your browser and choose “Set Image as Desktop Background…” from the menu that pops up.
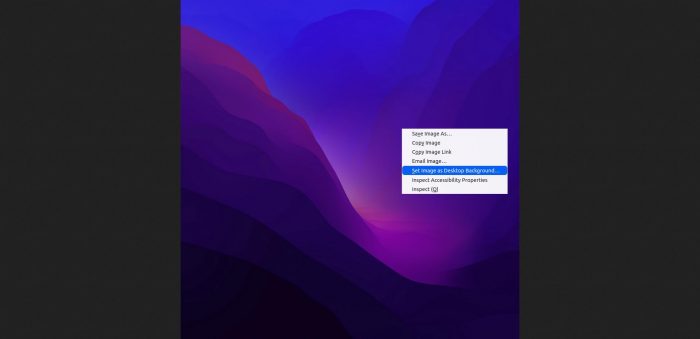
This will make Ubuntu’s Desktop Background dialog appear. Check the preview and play with the options in the Position menu to change how the image will appear on your screen.
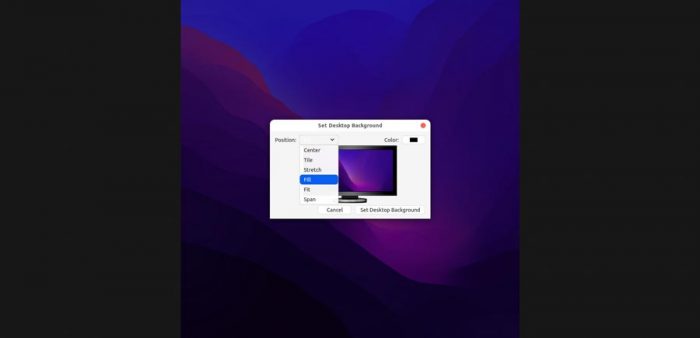
Finally, click on Set Desktop Background on the bottom right to use the image as your desktop’s wallpaper.
Enjoy Your It-Only-Looks-Like-a-Mac
You did it – you’re now the proud owner of a… well, it might look like a Mac, but it’s still the powerful and versatile Ubuntu we all know and love! Remember, we’ve only changed how the OS looks, not how it works.

Thus, you can still install and run anything you wish or play with your Kernel’s innards. No need to worry if you’re breaking some obscure NDA or Apple’s guidelines on how you should use your computer.
Yay for freedom (and customizability)!