phpMyAdmin is a MySQL web administration tool, which allow us to administrate MySQL database in graphical interface (from your browser) and available for Ubuntu 11.04 (natty narwhal) or 10.10 (Maverick Meerkat) or 10.04 (Lucid Lynx) or any other Linux distros. Since phpMyAdmin is written in PHP (Hypertext Preprocessor (Surprised! it’s a recursive acronym), The most popular scripting language, used for server side processing); of course it’s an open source (and Free!) and cross platform application, so you can also use it on Windows NT based operating system such as Windows XP or 7; or Mac OS X.
phpMyAdmin is specially useful for beginners because it allows them to create, modify, delete or update – tables, field and rows, users permissions and settings etc in much simpler (as compared to command line interface) way. For Ubuntu phpmyadmin is the best (probably) tool for managing and controlling MySQL database.

What You can do with phpMyAdmin ?
- browse databases and tables
- “create, copy, rename, alter and drop” tables and databases
- perform table maintenance
- execute SQL statements/queries
- manage MySQL users and privileges
- search globally in databases
- create and read dumps of tables or databases …
Installing phpMyAdmin on Ubuntu 10.04/10.10/11.04
Open Terminal (CTRL+ALT+T) and type the following command(s) to install phpMyAdmin (on your computer running Ubuntu or other debian based Linux distribution). Remember you need to install MySQL and Apache first, see there – installing mysql on ubuntu 11.04 or install Apache server on ubuntu. or installing php on ubuntu; more simply install the LAMP (Linux+Apache+MySQL+PHP) package from synaptic package manager. Then phpmyadmin : –
sudo apt-get install phpmyadmin
Alternative Method : Open Synaptic package manager, search for ‘phpmyadmin’, check the box for installation and click on Apply button (don’t forget to select yes for dependencies, I mean dependent libraries or program) to install the selected programs.
Login to phpMyAdmin to start administrating MySQL
Open any browser such as Google Chrome or Mozilla Firefox and type the following URL in the address bar (or click here )
http://localhost/phpmyadmin/
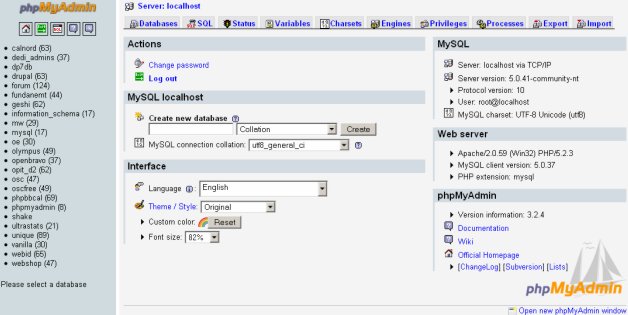
Then, you will get a window like this –

Next, enter the login information – i.e MySQL username and password
>> ‘root’ as username
>> ‘password’ as the password that you entered while installing MySQL
That’s all..Now you are ready to rock with phpMyAdmin.
Recommended References :
what type of snipping tool do you use?
please help me phpmyadmin is not working i have installed apache2 send me message or contact me plz
Thanks for your tutorial
Not Found
The requested URL /phpmyadmin was not found on this server.
http://localhost/phpmyadmin
this is correct you need to put in this http://serveriphere/phpmyadmin
so edit de serveriphere whit your server ip ur host name
its not working for i have installed lamp and phpmyadmin but
Not Found
The requested URL /phpmyadmin was not found on this server.
Apache/2.2.20 (Ubuntu) Server at localhost Port 80
I have installed phpmyadmin using sudo apt-get install phpmyadmin in ubuntu 11.04, when I start to start it uisng localhost/phpmyadmin, it is not working, Any one to help me please!
I’ve installed phpMyAdmin on BSD machines before, but it’s been awhile. I installed using the synaptic package manager, and selected lighttpd as the httpd server. LIght runs fine, mysql is up and running, but when I log in to phpMyAdmin I get
402 Forbidden.
So, I point my browser to localhost/phpmyadmin/setup, and I get a login screen that states:
“The server localhost:80 requires a username and password. The server say phpMyAdmin Setup.”
I’ve tried both blank, admin & blank, admin & admin, root & pass for MySQL, phpMyAdmin & Setup, and none of these combinations get me past this stage.
Any thoughts?
403 Forbidden, sorry. Also, am running Ubuntu 11.10.
hurrreeeeee..it works……:)
thank you…