WiFi radar is a simple application program(Open source and free),utility to manage Wifi profiles on Ubuntu OR any other Linux Based Operating system.By using wifi radar you can scan for available networks,then create profile for the network of your choice(The network in which you are allowed to use).The Graphical interface of Wifi Radar is very simple and easy to use,you can just drag and drop your preferred network for arranging the priority of the network profile.Wifi Radar is mostly recommended for Laptop Users.

How to Install Wifi Radar on Ubuntu
Install Wifi Radar from Synaptic Package Manager/Ubuntu Software Center
Use Synaptic Package Manager or Ubuntu Software Center to search for ‘wifi’ and then click on install/check->Apply for installing the Wifi Radar on Ubuntu 9.10/10.04/10.10.It will take few moments..and installation will complete.
Install Wifi Radar Using Command Line/Terminal
Open Terminal(CTRL+ALT+T or Applications->Accessories->Terminal)
and run the following command –
sudo aptitude install wifi-radar
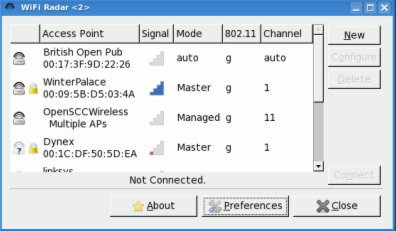
Use/Configure Wifi Radar on Ubuntu
Open Wifi Radar from Applications->Internet->Wifi Radar,and enter your password to configure Wifi Radar for your need.